3Dモデリングの知識なし、言葉のみの指示でここまでのモデルを無料で作れてしまうことに恐怖すら感じてしまう。恐るべし、AI技術。
Just created a 3D model with @tripoai's amazing AI-powered tool. Take a look here: www.tripo3d.ai/share/5daa2826-aae2-4768-ba83-da5a9c75ac93
#tripoai #tripo #GenAI
Tripo
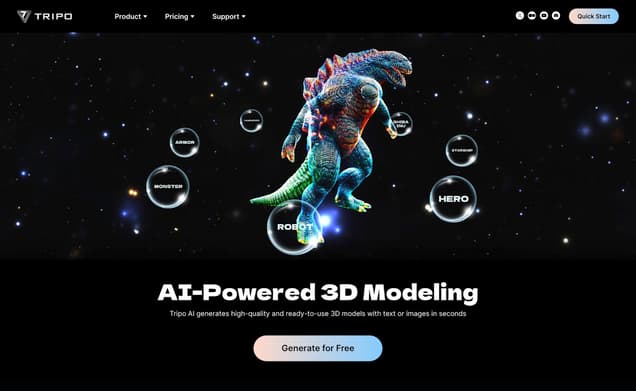
What is Tripo ?
Tripo stands out as a revolutionary 3D Generator, seamlessly blending the realms of artificial intelligence and 3D model creation. It empowers users to bring their imaginative concepts to life with unparalleled ease and precision. This innovative tool is designed to cater to a wide range of creative needs, making it an indispensable asset for designers, artists, and enthusiasts aiming to explore the vast possibilities of 3D modeling.
Features :
- The official site of Tripo provides an extensive list of features that showcase the tool's capabilities in 3D modeling and design. However, specific feature details require direct exploration of their platform.
Pricing :
- Unfortunately, specific pricing details are not directly accessible without further engagement on the Tripo official website.
Estimated Visit Traffic :
61.72K /MonthUser Distribution :
China - 41.75% | Taiwan - 8.42% | United States - 8.3% | Germany - 7.15% | Malaysia - 6.96%Tags :
3d GeneratorShare to : 


Conquering 3D Rigging: Mastering Bone Binding in 3D Models
Welcome to Tripo AI's latest tutorial, where we dive into the intricacies of bone binding and rigging in 3D models. Through this tutorial, we'll unveil the step-by-step process using Mixamo, ensuring your models are ready for dynamic actions with symmetry and precise control.
1. Getting Started with Mixamo
First off, you'll want to upload your model by clicking 'Upload Character'. Positioning is key, and Mixamo's interface simplifies this. Move your model's left ring as indicated by the color cues; Mixamo will mimic these adjustments symmetrically.,Ensuring symmetry, you can nudge the wristbands into place; the system will mirror these changes. By unchecking 'Use Symmetry', you gain the freedom to position each part individually, crafting an anatomically accurate setup.,Once binding is successful, you're ready to breathe life into your model. Explore the action library, preview movements, and when satisfied, download the FBX file to import into Blender, where the real magic happens.
2. Precise Calibration with Auto-rig Pro
Transitioning to Blender, initiate with a preliminary calibration of your model, ensuring it's facing the negative y-axis and maintaining symmetry. Use shortcut keys like Control + Option + S to perfect your viewpoint.,Select your character, Pikachu or any other, and determine the rigging detail level – full body or facial only. Follow on-screen prompts to place bones accurately, checking the result from every possible angle.,Adjust any disproportionate nodes using the 'G' shortcut. Locate the small sphere at each bone's connection point, and finetune its position. These refinements make for a more realistic and responsive rig.
3. Smooth Workflow Encounters
Some users expressed their enthusiasm for the user-friendly nature of Mixamo, highlighting how selecting and downloading animations turned into a seamless endeavor.,Others found the symmetry features to be a game-changer, allowing for hassle-free mirroring that accelerated the rigging process, turning a tedious task into an enjoyable experience.,However, a few users bumped into roadblocks while trying for perfect symmetry, underscoring the importance of double-checking alignments and ensuring consistent calibration throughout the process.
4. Auto-rig Pro: A Mixed Bag of Tricks
Many remarked positively on the precision and control that Auto-rig Pro afforded them, celebrating how it turned intricate adjustments into a walk in the park.,Yet, not all was smooth sailing as some navigated through tricky waters of node positioning, recognizing that while Auto-rig Pro is powerful, mastering its nuance takes dedication and a keen eye.,In these comments, the common thread was the balancing act between the software's capabilities and the animator's intuition, reiterating the adage that the best tools still require a human touch for perfection.
5. Tripo Video Summary
Mastering the art of bone binding and rigging is crucial for bringing 3D models to life with natural movements. This article covers the process from uploading and positioning your model in Mixamo, adjusting bones, to using Auto-rig Pro in Blender for fine-tuning. By following these guidelines, you can infuse your models with the flexibility needed for intricate animation.
Other Tripo Related Videos
User Reviews On Twitter
 ドク@テニス・麻雀愛好家メタボ対応で、21年7月からテニスを始め、体重-10kg達成。 麻雀の経験を活かした戦略的なダブルステニスをプレイしたい、と模索中。なんでも真剣にやれば人生最高に楽しいです。光速卓民
What users think about Tripo - from Twitter
- AI tool Tripo allows creating detailed 3D models simply using verbal instructions, requiring no knowledge of 3D modeling.
- The tool is available for free and its ability to produce high-quality models has elicited feelings of awe and a touch of fear for its advanced AI capabilities.
- Users can share their created 3D models online, as evidenced by a shared link to a model created using Tripo.
- #tripoai and #GenAI are associated hashtags that may indicate Tripo's relevance in the AI and generative AI communities.
Tripo Pros and Cons
Pros :
- Tripo's unique AI-driven approach to 3D model generation offers an innovative solution for creative professionals and hobbyists alike.
Cons :
- Specific cons of Tripo could not be detailed without direct access to user reviews or more in-depth exploration of the tool's functionalities.
Tripo Use Cases
- Direct use cases of Tripo are best explored by visiting their official website, where a variety of applications and examples are likely showcased to inspire and inform users.
Similartool.ai Spotlight
Display Your Achievement: Get Our Custom-Made Badge to Highlight Your Success on Your Website and Attract MoreVisitors to Your Solution.
Copy Embed Code